前言:
系统环境为:win10,本次用的是tensorflow1.12.0
完整目录为:
python人工智能 利用Tensorflow object detection API 搭建物体识别模型(一)CPU版
python人工智能 利用Tensorflow object detection API 搭建物体识别模型(二)CPU版
python人工智能 利用Tensorflow object detection API 搭建物体识别模型(三)CPU版
上篇我们已经手动标记好了鱼,我们开始训练自己的模型
一、开始训练
进入如下目录D:\ai\objDetect3\mubiaojiance,运行代码
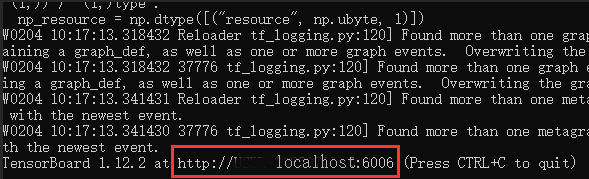
python D:/ai/objDetect3/models/research/object_detection/model_main.py --pipeline_config_path=training/ssdlite_mobilenet_v2_coco.config --model_dir=training --alsologtostderr

接着会输出一大堆warning,不用管,继续等,直到输出下面红色框那一行,说明运行成功了,已经开始在训练了。
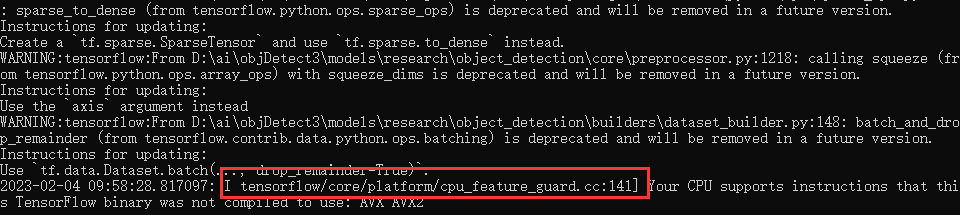
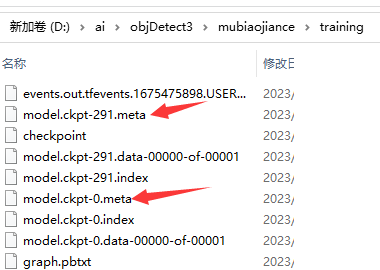
我们可以看到D:\ai\objDetect3\mubiaojiance\training生成了一些数据:model.ckpt-0.meta
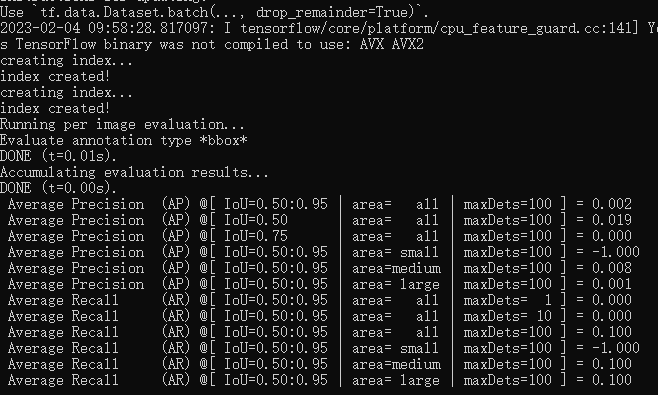
多等一会,至少等它训练10分钟以上,我们看下这个目录:
它每隔一段时间就会备份一个模型,我们最终要的是model.ckpt-xxx数字最大的那个文件。目前等待即可,也可以操作下一步,用图表的方式查看训练进度。
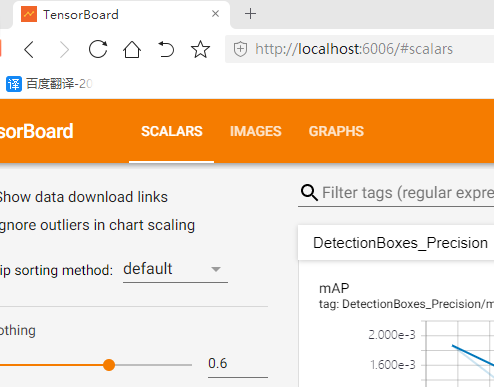
二、监控训练进度
模型训练稳定地进行后,我们进入如下目录,打开一个新的conda环境,运行命令
cd /d D:\ai\objDetect3\mubiaojiance
tensorboard --logdir=training
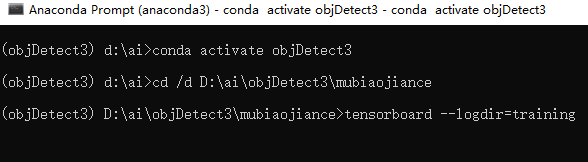
可以看到监控的本地地址:http://localhost:6006,用浏览器访问一下
监控界面如下:
三、测试一下我们训练好的模型
模型训练的越久,准确度越高。
(1)导出最新的那个训练好的模型
我们看到574这个数字最大,就取这个替换到下面代码中--trained_checkpoint_prefix字段,然后在D:\ai\objDetect3\mubiaojiance目录下执行:
cd /d D:\ai\objDetect3\mubiaojiance
set PYTHONPATH=D:\ai\objDetect3\models;D:\ai\objDetect3\models\research;D:\ai\objDetect3\models\research\slim
python D:/ai/objDetect3/models/research/object_detection/export_inference_graph.py --input_type=image_tensor --pipeline_config_path=training/ssdlite_mobilenet_v2_coco.config --trained_checkpoint_prefix=training/model.ckpt-574 --output_directory=fish_inference_graph
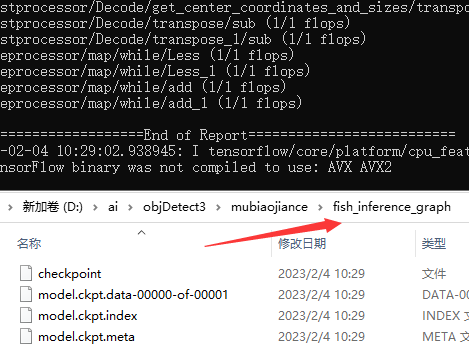
它自动生成了fish_inference_graph目录和模型文件。导出成功
(2)代码测试
我们直接用D:\ai\objDetect3\mubiaojiance\n01440764作为测试图片
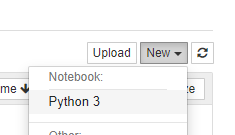
我们在D:\ai\objDetect3\mubiaojiance打开jupyter notebook
cd /d D:\ai\objDetect3\mubiaojiance
jupyter notebook

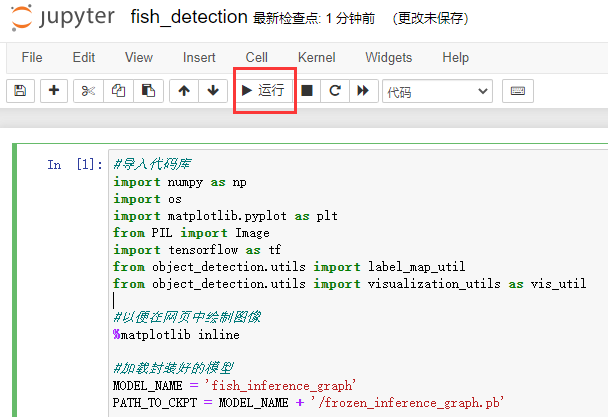
再打开的网页中,新建一个python文件,命名为:fish_detection
同时输入如下代码:
#导入代码库
import numpy as np
import os
import matplotlib.pyplot as plt
from PIL import Image
import tensorflow as tf
from object_detection.utils import label_map_util
from object_detection.utils import visualization_utils as vis_util


#以便在网页中绘制图像
%matplotlib inline


#加载封装好的模型
MODEL_NAME = 'fish_inference_graph'
PATH_TO_CKPT = MODEL_NAME + '/frozen_inference_graph.pb'
detection_graph = tf.Graph()
with detection_graph.as_default():
    od_graph_def = tf.GraphDef()
    with tf.gfile.GFile(PATH_TO_CKPT, 'rb') as fid:
        serialized_graph = fid.read()
        od_graph_def.ParseFromString(serialized_graph)
        tf.import_graph_def(od_graph_def, name='')


#加载标签映射文件,label_map中文叫做标签映射
NUM_CLASSES = 1
PATH_TO_LABELS = 'training/my_label_map.pbtxt'
label_map = label_map_util.load_labelmap(PATH_TO_LABELS)
categories = label_map_util.convert_label_map_to_categories(label_map, max_num_classes=NUM_CLASSES, use_display_name=True)
category_index = label_map_util.create_category_index(categories)


#图片数据转换为numpy的ndarray对象
def load_image_into_numpy_array(image):
  (im_width, im_height) = image.size
  return np.array(image.getdata()).reshape(
      (im_height, im_width, 3)).astype(np.uint8)


#从文件夹中随机选10张图片
import random
dir_path = 'n01440764'
imageName_list = os.listdir(dir_path)
imagePath_list = [os.path.join(dir_path, imageName) for imageName in imageName_list]
selected_imagePath_list = random.sample(imagePath_list, 10)
selected_imagePath_list


#用10张图片测试模型的目标检测效果
with detection_graph.as_default():
    with tf.Session(graph=detection_graph) as sess:
        # Definite input and output Tensors for detection_graph
        image_tensor = detection_graph.get_tensor_by_name('image_tensor:0')
        # Each box represents a part of the image where a particular object was detected.
        detection_boxes = detection_graph.get_tensor_by_name('detection_boxes:0')
        # Each score represent how level of confidence for each of the objects.
        # Score is shown on the result image, together with the class label.
        detection_scores = detection_graph.get_tensor_by_name('detection_scores:0')
        detection_classes = detection_graph.get_tensor_by_name('detection_classes:0')
        num_detections = detection_graph.get_tensor_by_name('num_detections:0')
        for imagePath in selected_imagePath_list:
            image = Image.open(imagePath)
            # the array based representation of the image will be used later in order to prepare the
            # result image with boxes and labels on it.
            image_np = load_image_into_numpy_array(image)
            # Expand dimensions since the model expects images to have shape: [1, None, None, 3]
            image_np_expanded = np.expand_dims(image_np, axis=0)
            # Actual detection.
            (boxes, scores, classes, num) = sess.run(
              [detection_boxes, detection_scores, detection_classes, num_detections],
              feed_dict={image_tensor: image_np_expanded})
            # Visualization of the results of a detection.
            vis_util.visualize_boxes_and_labels_on_image_array(
              image_np,
              np.squeeze(boxes),
              np.squeeze(classes).astype(np.int32),
              np.squeeze(scores),
              category_index,
              use_normalized_coordinates=True,
              line_thickness=8)

                  final_score = np.squeeze(scores)
                        count = 0
                        retData = []
                        for i in range(100):
                         if scores is None or final_score[i] > 0.5:
                             count = count + 1
                        (im_width, im_height) = image.size
                        for i in range(count):
                         #print(boxes[0][i])
                         y_min = boxes[0][i][0]*im_height
                         x_min = boxes[0][i][1]*im_width
                         y_max = boxes[0][i][2]*im_height
                         x_max = boxes[0][i][3]*im_width
                         retData.append({"imagePath":imagePath, "index":i, "left":int(x_min), "top":int(y_min), "width":int(x_max-x_min), "height":int(y_max-y_min), "score":final_score[i]})

                        print(retData)

            plt.figure(figsize=(12,8))
            plt.imshow(image_np)
选中单元格后,点击Run运行
稍等一会,可以看到结果
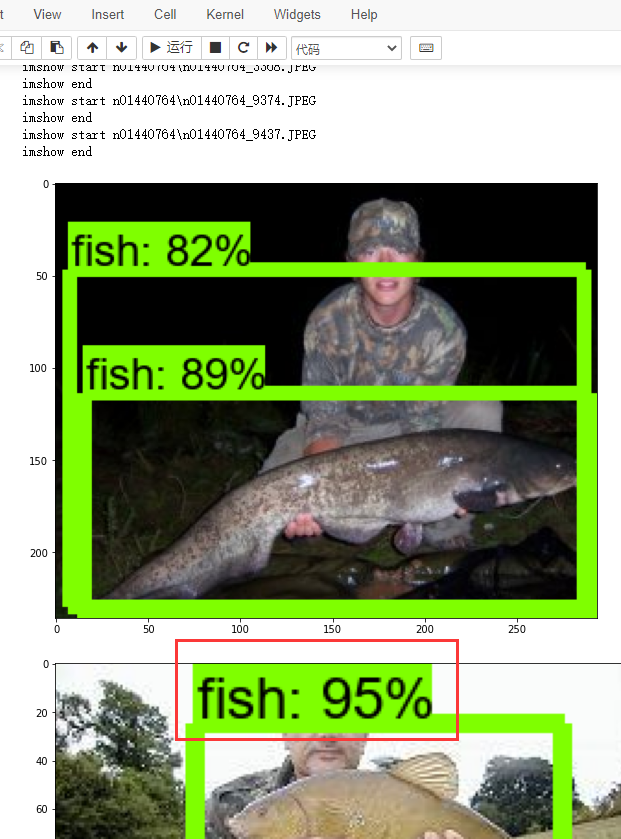
最后这个识别结果,就是利用我们自己的模型实现的,准确率还是很高的。至此我们实现了Tensorflow object detection API 搭建物体识别模型方法。